Installation
Download the WordPress plugin below:
Install the plugin
Download the plugin by clicking on one of the links above. After downloading, log in to your WordPress website as an admin.
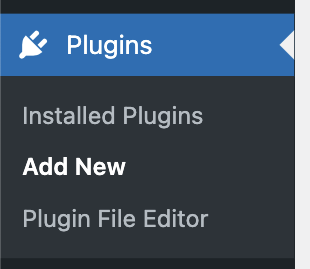
- Go to Plugins, then click Add new.
- Click on upload plugin followed by choose file. Choose the file you just downloaded.
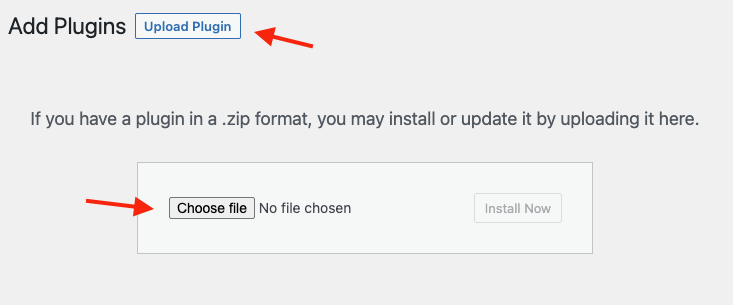
After selecting the file you downloaded, click on Install now.
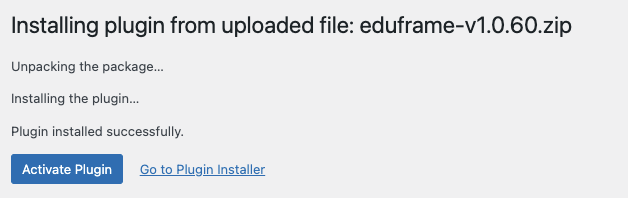
- Activate the plugin After installing the plugin, you need to activate it.
Connect to Eduframe
This WordPress plugin requires an API key to access the course data in Eduframe. You can follow these steps to create an API key in Eduframe.
The WordPress plugin requires the following scopes:
courses:read(Required for products, meetings, variants)settings:read(Required for labels, course_locations, course_variants)teachers:read(Required for teachers)
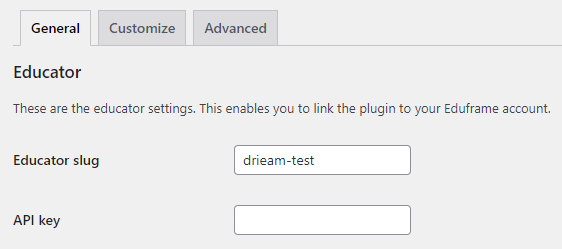
Once you have created an API key, in WordPress go to Plugins -> Eduframe -> Settings -> General. Here you paste the API key in the field 'API key'.
You also need to fill in the 'Educator slug', which you can find when opening Eduframe. It is the text in the URL before .eduframe.nl. For example, the slug is "drieam-test" if the URL is https://drieam-test.eduframe.nl.
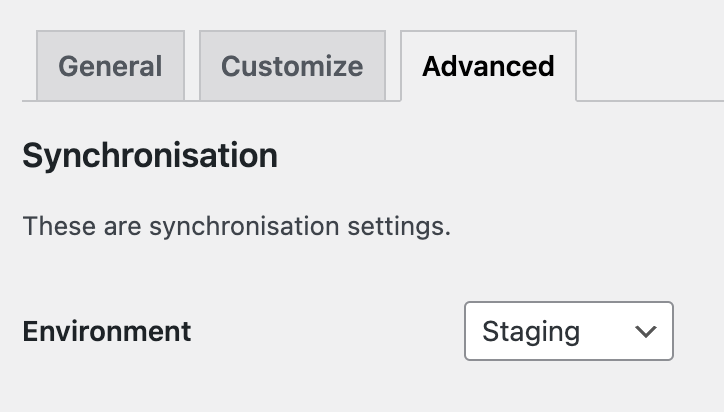
On the Advanced tab, you need to select the correct environment. This is not related to the educator slug. For example, you can have a test instance on Eduframe production.
If your URL ends in .eduframe.nl, select "Production". If your URL ends in .edufra.me, select "Staging". For example, select "Production" if the URL is https://drieam-test.eduframe.nl.
The WordPress plugin relies on having at least one Template description section enabled in Eduframe. Without it, the plugin will not work.
Verify this in Eduframe by going to Settings -> Product settings -> Template description sections.
Set up the permalinks
This plugin comes with its own post types specific to products and variants. These have their own URLs on the website, but they require a specific permalink setting to work correctly.
You can choose which main slug is used for products and teachers. By default it looks like /products/name-of-the-course/. If you go to Settings -> Eduframe -> the Customize tab, it will show the options Course/Program slug and Teacher slug. You can change these to whatever you want, which will replace the /products/ in the example URL above.
After this, you should still change a WordPress setting for permalinks. Go to Settings -> Permalinks; under Common Settings, choose the option called 'Post name' and click save.
After changing the permalink settings, you must update the WordPress permalink settings as well; otherwise, the plugin cannot find the corresponding pages.
Bootstrap
The default styling within the plugin heavily relies on Bootstrap. However, it is not an included dependency, as the choice to use Bootstrap is yours. If you do not use Bootstrap (as part of your theme), you will have to style the plugin yourself. If you are new to the plugin and want to try it out first, you can use the bootstrap-basic theme.
Signup URL back to website
On some pages, the plugin links to the Eduframe signup. For the back to website button to work on the signup, you have to set up the trusted URL in Eduframe. You can read how to do this here.
Next steps
You are now ready to start using the plugin! See what you can do next: